Top Measuring Instruments for Precision Quality Control in Manufacturing
Top Measuring Instruments for Precision Quality Control in Manufacturing
When making parts, precision isn't just a nice-to-have—it's the bare minimum.
If quality control’s not locked in, things go off track fast. Customers start noticing. Rework piles up. Tolerances turn into trouble.
That’s where solid measuring tools come in. Not the flashy ones with features you never use—but the workhorses you trust daily. Tools that tell you, clearly and confidently, if a part’s right or wrong.
This list focuses on the essentials—backed by tools you can grab from Penn Tool Co.—that help keep things in spec and out of the scrap bin.
Measuring Instruments for Precision Quality Control in Manufacturing
Digital Calipers – The Go-To for Daily Checks
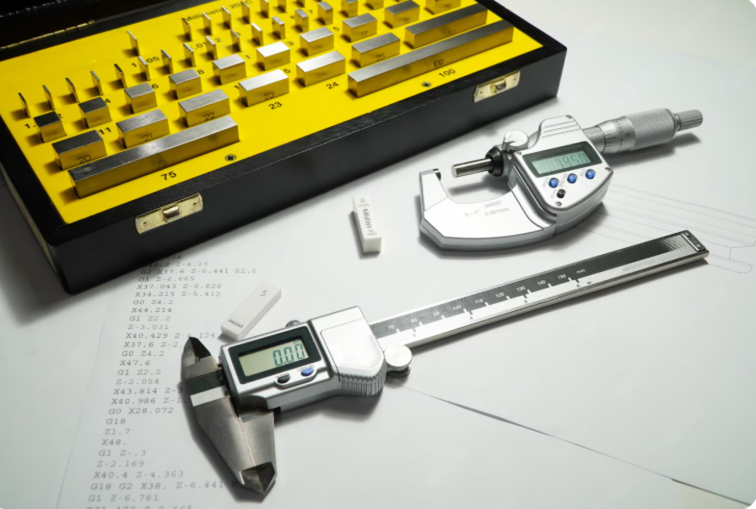
Need a quick measurement? Calipers are the first thing most machinists reach for. Internal, external, depth you name it. Easy to use, fast to read.
Try This: Fowler Ultra-Cal IV Electronic Caliper
- Clear digital screen
- Tough stainless steel
- Works in absolute and incremental modes
Great for first checks on freshly machined parts or double-checking stock before setup.
Micrometers – When It Has to Be Spot On
For those times when a thousandth matters, micrometers are your best friend. They are perfect for measuring outer diameters, thickness, and tight-tolerance parts.
Top Pick: Mitutoyo Outside Micrometer
- Ratchet stop avoids over-tightening
- Carbide tips last forever
- Delivers repeatable precision every time
Use them on shafts, sleeves, anything that has to hit spec dead on.
Bore Gauges – Inside Dimensions Done Right
Measuring a bore isn’t something you want to guess at. Bore gauges get it right, especially when paired with a mic or gauge block to set your zero.
Go With: Mitutoyo Dial Bore Gauge Set
- Comes with contact points and extensions
- Smooth dial action
- Built for daily use in the shop
A must for anything round that needs to fit perfectly inside something else.
Dial Indicators – Spot the Subtle Stuff
Want to see if a part’s running actual or flat? Dial indicators show what your eye can’t. Add a mag base, and you’ll have a setup staple.
Recommended: Federal Dial Indicator
- Ultra-sensitive readings
- Reliable under shop conditions
- Mounts clean on most setups
Use during setup or inspection—anytime you need to catch the small stuff.
Surface Plates – The Flat Reference Point
No matter how good your tools are, you need something truly flat to measure from. That’s what surface plates are for.
Best Bet: Starrett Granite Surface Plate
- Won’t rust, warp, or wear fast
- Dead flat for inspection setups
- Comes in sizes for every bench
Pair with a height gauge or indicator, and get a real measurement station.
Height Gauges – Vertical Accuracy on Lock
From checking part height to marking layout lines, height gauges bring precision from the ground up.
Suggested Tool: Mahr Digimar 816 CL
- Digital readout
- Smooth motion and fine adjustment
- Solid base to stay put while measuring
Use with a granite plate for best results. Especially useful when verifying cut depths or comparing parts.
Gauge Blocks – The Gold Standard
These blocks don’t measure - they prove other tools can. Every shop needs a good set of mics, calipers, and bore gauges.
Grab This: Mitutoyo Grade AS-1 Steel Gauge Block Set
- Super flat and polished
- Comes with a certificate
- Keeps your tools honest
A foundational piece of any serious QA setup.
Optical Comparators – When You Need to See It to Believe It
Some dimensions are easier to check when you see them big and bold. That’s where comparators shine.
Use Case: Mitutoyo Profile Projector
- Project the part outline onto a screen
- Great for threads, contours, or edges
- Easy visual comparison to a standard
No contact, no guessing. Just a clear picture of whether it’s right or not.
Thread Gauges – Fast Thread Checks
Threads either fit or they don’t. Thread gauges tell you fast if you’re on spec.
Simple Tool: Starrett Screw Pitch Gage
- Fold-out blades for different thread sizes
- Compact and sturdy
- Instant verification on the shop floor
Use before final assembly or during quick checks.
Bench Stands with Test Indicators – Micro Moves, Clear Reads
Pair a test indicator with a solid stand for those fine adjustments or tiny shifts. Great for checking runout or flatness.
Pair This: Interapid Test Indicator + Mitutoyo Magnetic Stand.
- Flexible setup options
- Super-sensitive reading
- Ideal for delicate work or final inspection
Perfect for detailed secondary ops or checking tiny parts.
Why These Tools Matter More Than Ever?
Modern machining is faster, tighter, and more demanding. One missed spec can derail a whole job. That’s why QA teams and machinists rely on trusted tools—not just fancy software or a visual once-over.
Real tools. Real results. Less waste.
Each of these instruments does its job quietly and reliably, helping you keep tolerances tight and standards high. When you trust professional brands like Penn Tool Co., you get tools backed by support, not just a warehouse shelf.
Don’t Just Inspect—Prevent
One of the most significant advantages of using high-precision measuring tools isn’t just catching errors—it’s preventing them. Early-stage inspections during setup or between machining operations can reveal tool wear, drift, or fixture misalignment before they ruin an entire batch.
For example, a quick check with a dial indicator can spot a wobbly chuck before it scrapes parts. Using a surface plate and height gauge during part setups ensures every workpiece starts square. These aren’t just quality checks—they’re workflow protectors.
A solid QA routine using reliable tools helps your team stay ahead of problems, not just react to them. The result? Less downtime, fewer surprises, and more confidence in the work leaving your floor.
Final Word
In the world of precision manufacturing, good enough isn’t. The tools you use to check parts matter as much as the machines that make them.
With the proper measuring instruments, you catch mistakes early, avoid rework, and keep jobs moving. When you get them from Penn Tool Co., you’re not just buying gear—you’re building confidence into your process.
Measure smart. Ship proud. That’s how quality gets done.


